
A Managed Account in Google Ad Manager 360 is a specialized feature designed to streamline the ad management process for publishers and advertisers. Essentially, it functions as a centralized hub where users can efficiently organize and oversee their advertising campaigns, inventory, and revenue streams. With Managed Accounts, users have granular control over access permissions, allowing them to designate specific roles and responsibilities to team members. Moreover, Managed Accounts offer enhanced security features and detailed reporting functionalities, enabling users to make data-driven decisions and optimize performance effectively.
Embarking on the journey to set up a Managed Account in Google Ad Manager 360 opens doors to a world of enhanced ad management capabilities and streamlined operations. Whether you’re a seasoned publisher or an advertiser looking to optimize your campaigns, understanding the process of creating a Managed Account is crucial. In this tutorial, we’ll walk you through the step-by-step procedures and best practices to establish a Managed Account’s AdExchange efficiently.
Step By Step
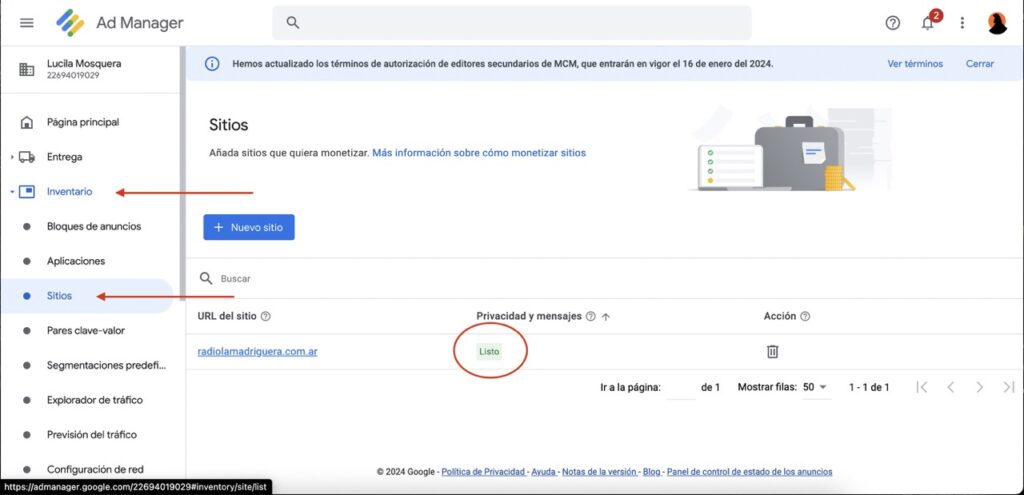
Before accepting the invite, doublecheck if the site is already approved in your Google Ad Manager to inherit that approval status in your Managed Account. You can do it here: Inventory > Sites > Ready ✅
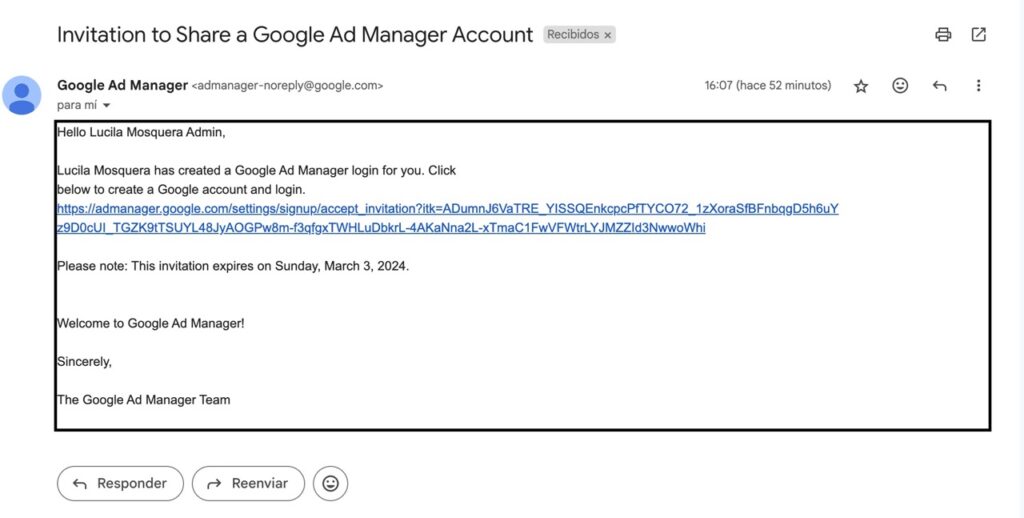
- Review Invite sent to you email> Accept
2. Once in your account: Go to Admin > Multiple Customer Management > Ad Exchange
You will see the following warning->

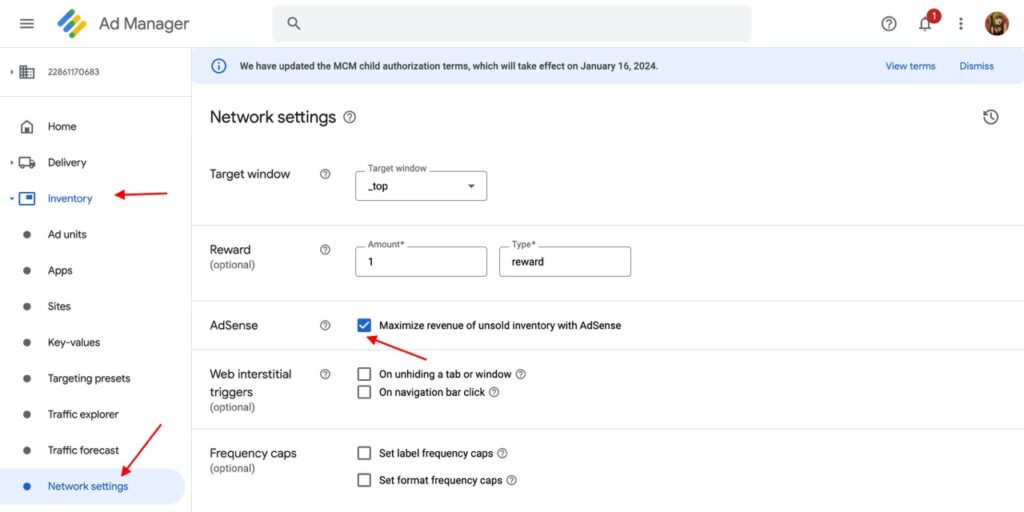
3. To deactivate the AdSense backfill go to:
Inventory > Network Settings > Uncheck “Maximize revenue of unsold inventory with AdSense” > Save
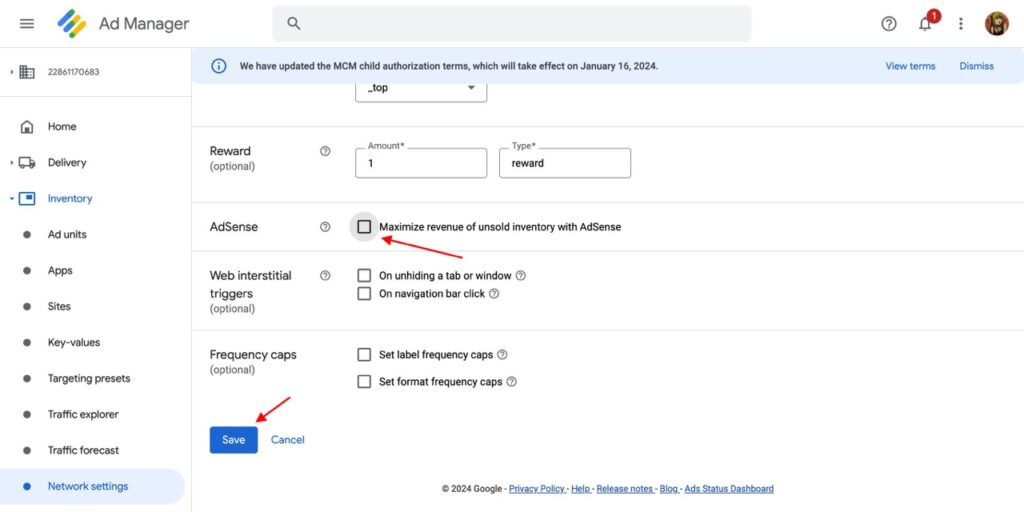
<This way.
4. Go back to Admin > Multiple Customer Management > Ad Exchange
Now it should look like this->

If it doesn’t: Refresh the page.
If it still doesn’t: You might have ad units created with AdSense backfill enabled. To change that go to Inventory > Ad Units > Remove status filter (Active and Inactive) > Select all ad units > Click on “Disable AdSense Backfill”.
Go back to Admin > Multiple Customer Management > Ad Exchange and refresh.

5. Review conditions> Continue > Continue > Enable Ad Exchange
6. Now that AdExchange is enabled you will need to create an Order. Go to Delivery > Orders> New Order
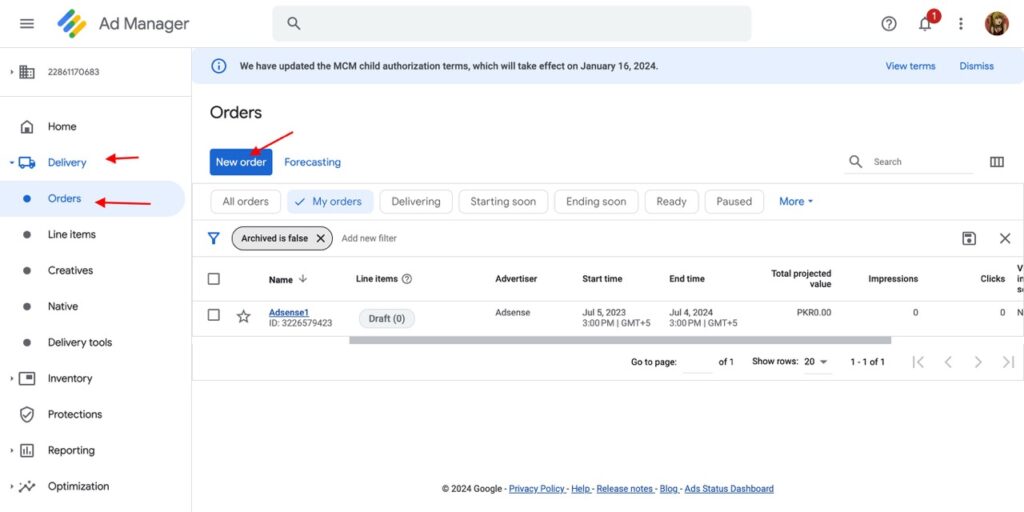
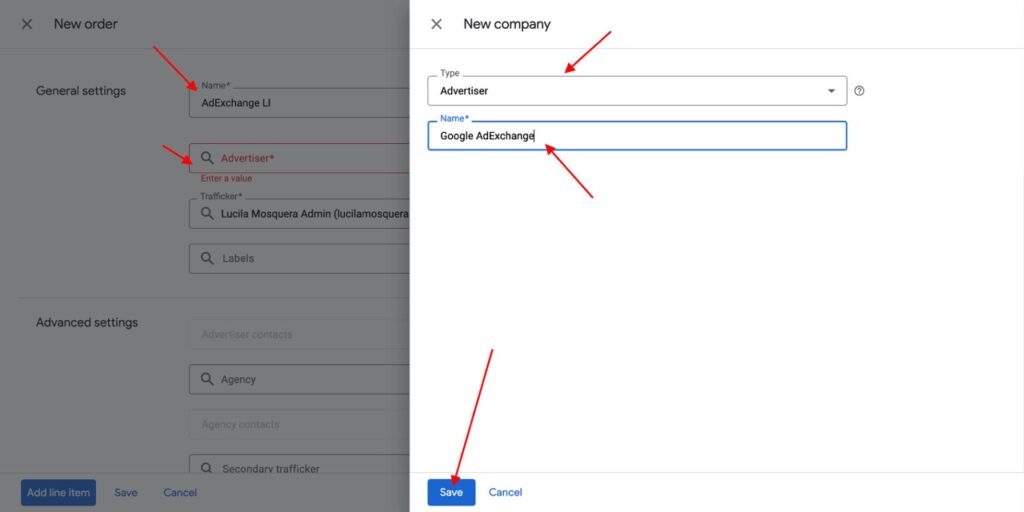
7.Name it> Select Advertiser> Add a new company> Type: Advertiser> Name > Save
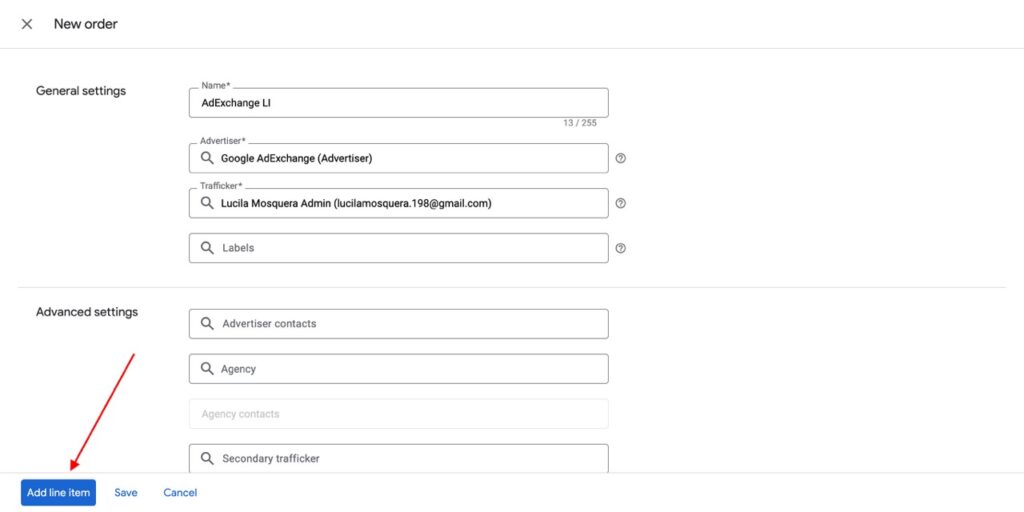
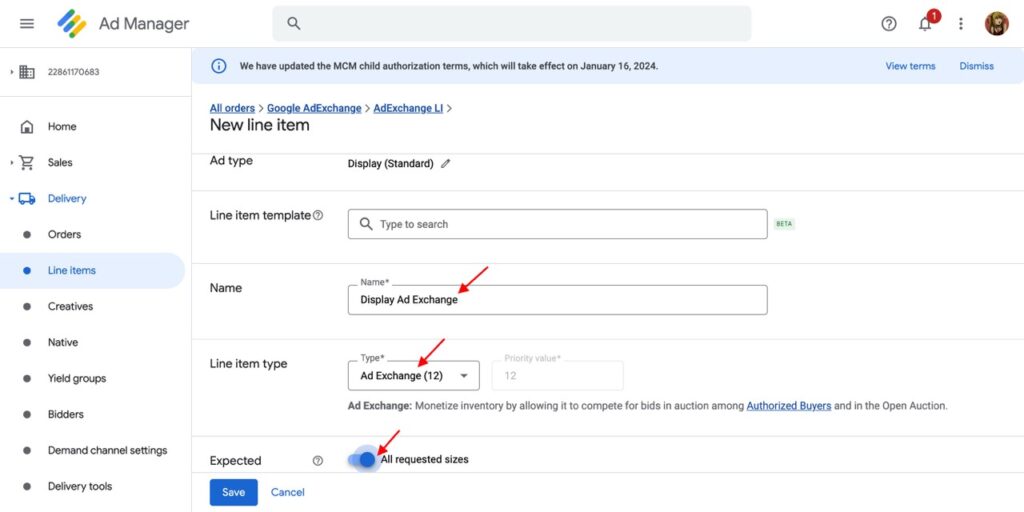
8. Add Line Item
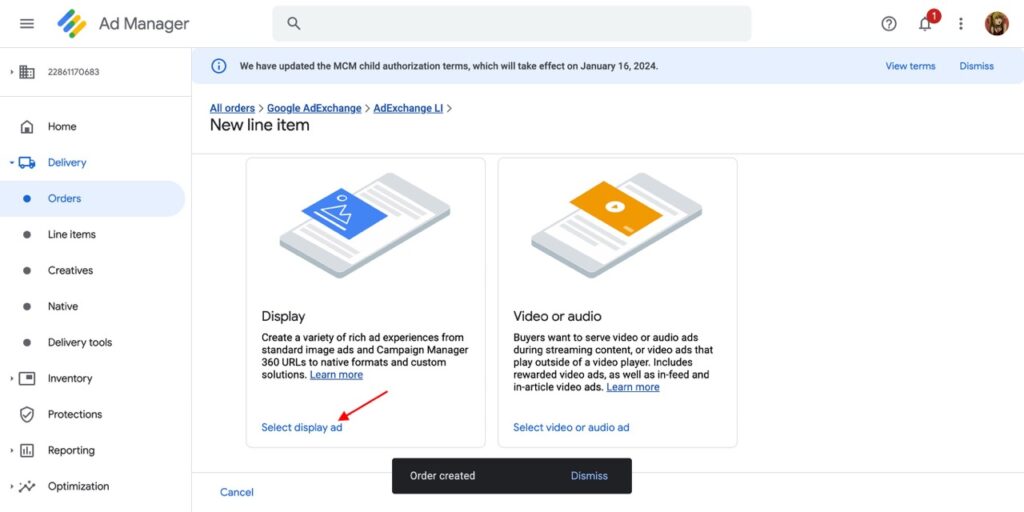
9. Select Display Ad
10. Name it > Line item type: Ad Exchange (12) > Select All requested sizes>
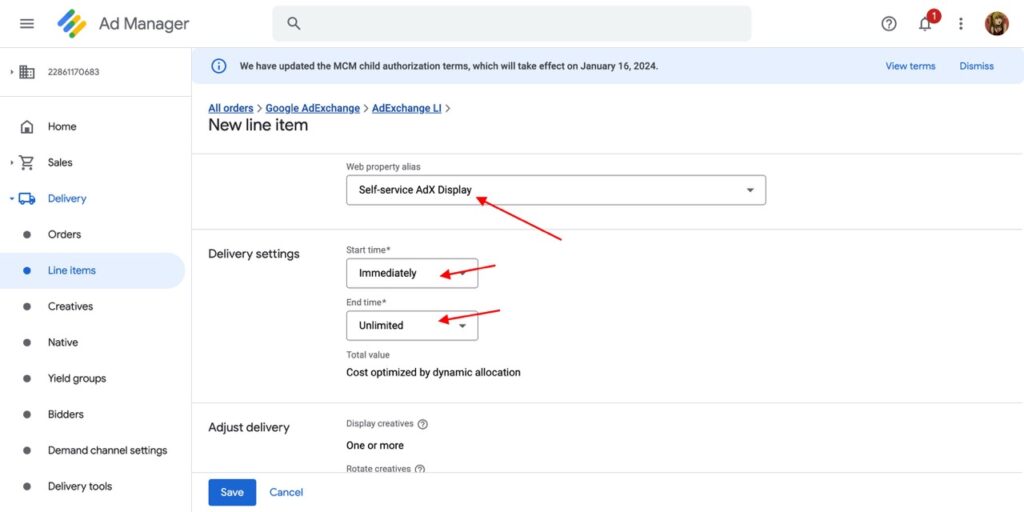
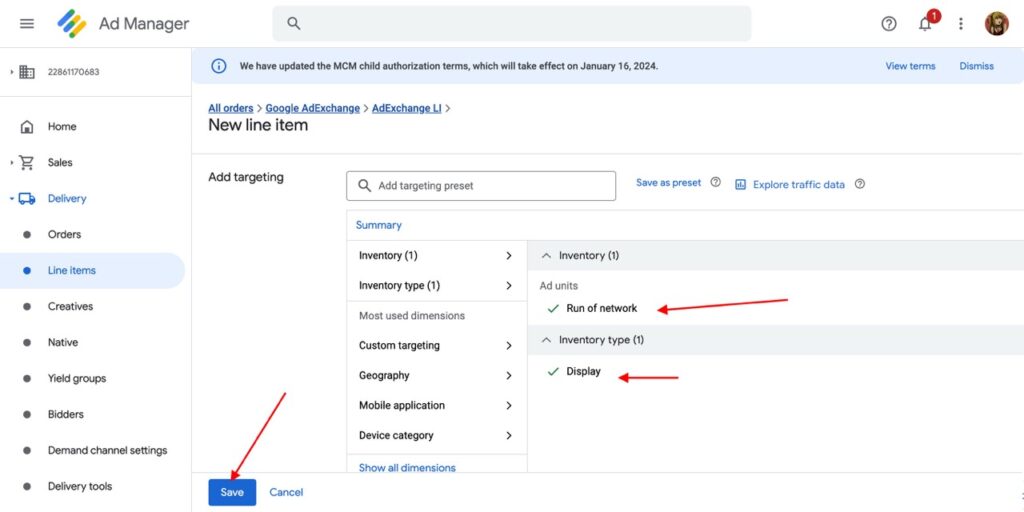
Select Web Property Alias: Self-Service Adx Display> Start Time: Immediately> End Time: Unlimited
Inventory: Run of network > Inventory type: Display> Save
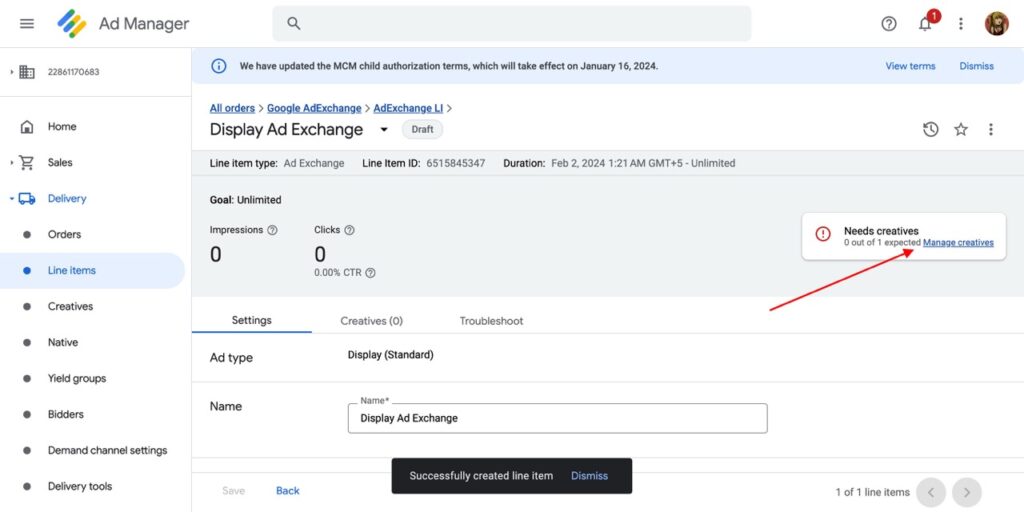
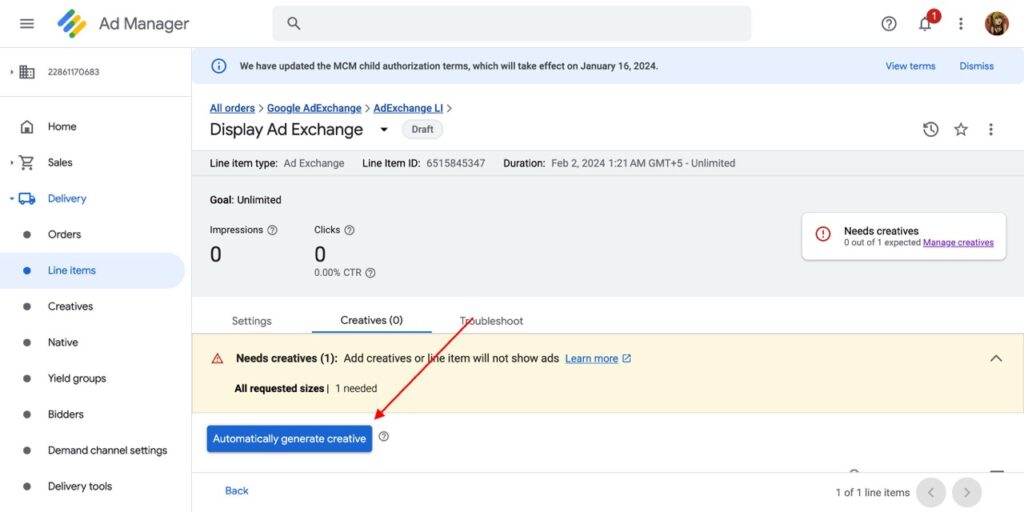
11. Click on the “Manage Creatives” notification.
12. Click on “Automatically generate creative”
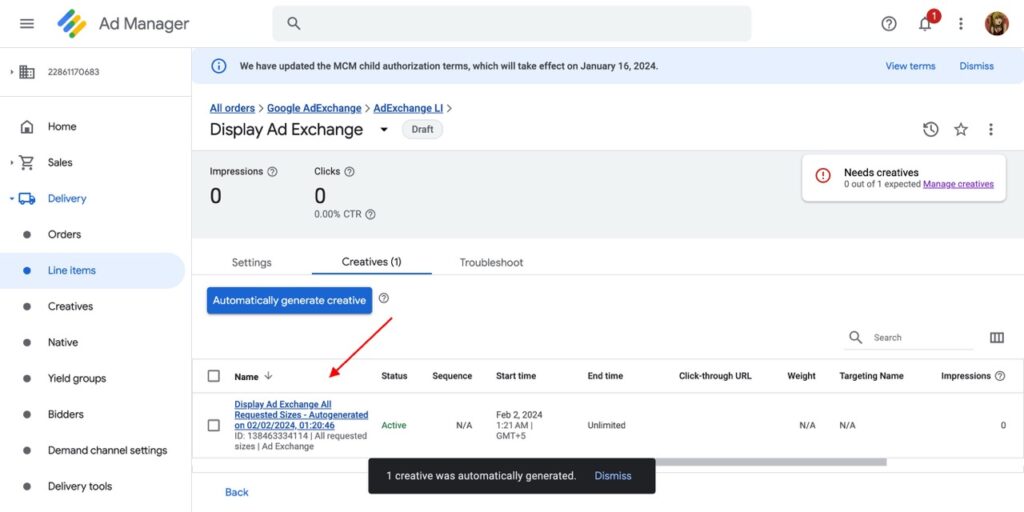
The following creative will appear>
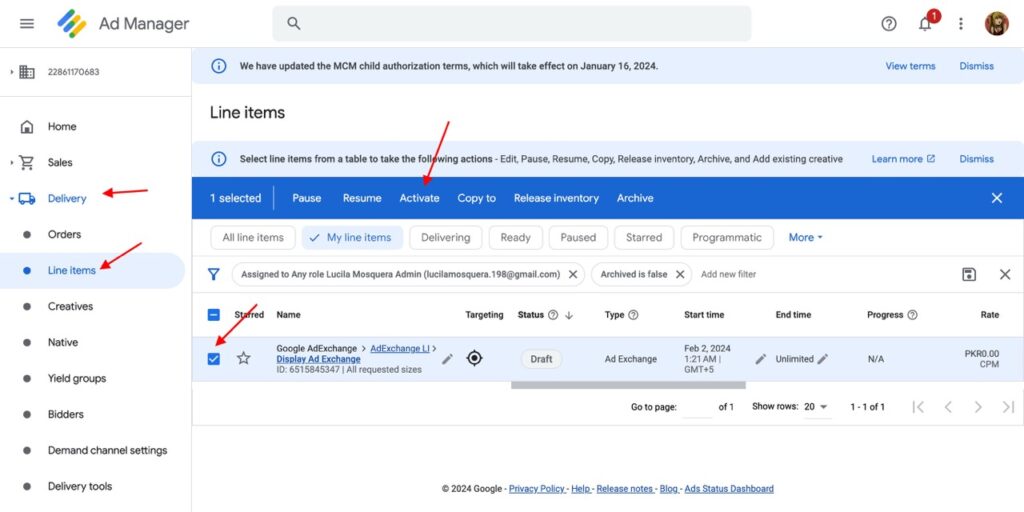
13. Go back to Delivery> Line Item> Select your recently created line item > Click on “Activate”
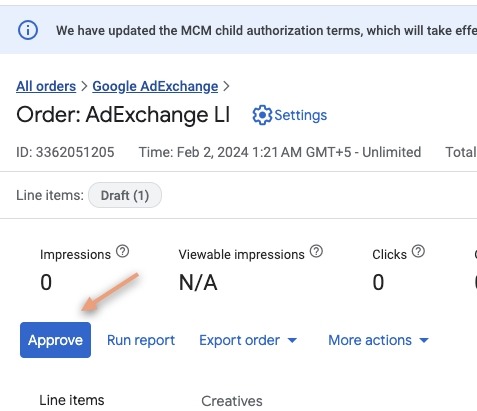
OR Click in your Line Item and then click on “approve” button
If you have followed all these steps and there’s still no delivery, check the status of the ads.txt in Admin> Ads.txt management.
To optimize your inventory you should go to Inventory>PricingRules, but we will look further into it on another blog post.
Mastering the setup of a Managed Account’s GAM is essential for optimizing your revenue streams. By following the detailed instructions, you’re poised to navigate the intricacies of AdExchange with confidence. Remember, continuous learning and adaptation are key in the ever-evolving landscape of online advertising.